
Integrating monday MCP with Claude using a Custom App
Connect Claude to monday.com through your own OAuth app so you control who connects, which scopes apply, and how the MCP connection is managed
Prefer a simpler setup? Claude supports a native monday.com integration. Add it from Claude's connectors / marketplace (AI connectors) and authenticate when prompted — no OAuth app required. See Connect monday MCP with Claude.
Use this guide when you want Claude connected to monday.com through your own OAuth app, instead of the hosted one-click connector. You get the same MCP tools in Claude, with tighter control over who can connect and what the connection is allowed to do.
For the full organization-wide pattern (any MCP client, authorization flow details, and approach comparison), see Control MCP access with your own OAuth app.
Why use a custom app with Claude
By default, Claude (and other AI assistants) can connect via monday.com's hosted MCP connector: users click Connect, sign in, and they're done. That path is fastest, but it's all-or-nothing — once enabled, any user who can log in, from any MCP-compatible client, can connect, and the connection inherits that user's full monday.com permissions.
A custom OAuth app is the right choice when you need to:
- Limit scopes — Cap MCP actions with app-level permission scopes (for example
boards:readonly), even if the user has broader permissions in monday.com - Choose who connects — Share Client ID and Client Secret only with approved users; everyone else stays locked out
- Prefer Claude specifically — Route access through credentials you control, rather than leaving the hosted connector open to any MCP client
- Revoke cleanly — Remove one user, or rotate the Client Secret to cut off everyone, without disrupting unrelated integrations
- Keep a separate audit trail — Authorized users and activity appear under your app in the developer platform
Tradeoff: Each user adds a custom connector and enters credentials. You're responsible for storing and rotating the Client Secret securely.
This path is also appropriate while you're developing a private or org-internal MCP setup. To let other monday.com accounts connect your client, use dynamic client registration. The customer's admin approves the additional connection and its redirect URIs through dynamic connectors.
Before you start
You'll need:
- Permission to create an app in the monday.com Developer Center
- Admin access to turn off the hosted MCP connector for your account (so users can't bypass your app)
- A Claude account that can add custom connectors
Step 1: Create your OAuth app in monday.com
The monday MCP server uses the standard OAuth 2.0 Authorization Code Grant, with monday.com as the identity provider.
Create your app
- Log in to your monday.com account. Click your profile picture in the top-right corner and select Developers to open the Developer Center
- Click + Create app in the top-right corner
- Enter an App Name and App Slug, then click Create app
Configure OAuth settings
- In the left sidebar under Build, click OAuth & Permissions
- Open New OAuth flow and switch the toggle on. You must turn this on to connect to MCP with a custom app — while the toggle is off, the app cannot authenticate to the MCP server
- On the Scopes tab, select only the permission scopes your integration needs — these scopes cap what the MCP connection can do (add all during testing if needed)
- Switch to the Redirect URLs tab and add your callback URL — the URL where monday.com sends authorization codes — then click Save
New OAuth flow must be on. Find it on your app under Build → OAuth & Permissions → New OAuth flow. Switch the toggle on before you connect. A custom app cannot connect to MCP while this toggle is off.
Retrieve your credentials
- Go to General Settings in the left sidebar of your app
- Scroll down to the App Credentials section and copy your Client ID and Client Secret
NOTEYour client secret is a secret. Never share it or add it to source code others can access. You can regenerate it from the app's settings if it's ever compromised.
Step 2: Turn off the hosted MCP connector
In your monday.com admin settings, disable the built-in hosted MCP connector. This step matters: as long as it's on, users can bypass your app and connect the old way.
Step 3: Add monday.com as a custom connector in Claude
- In Claude, go to Settings → Connectors → Add
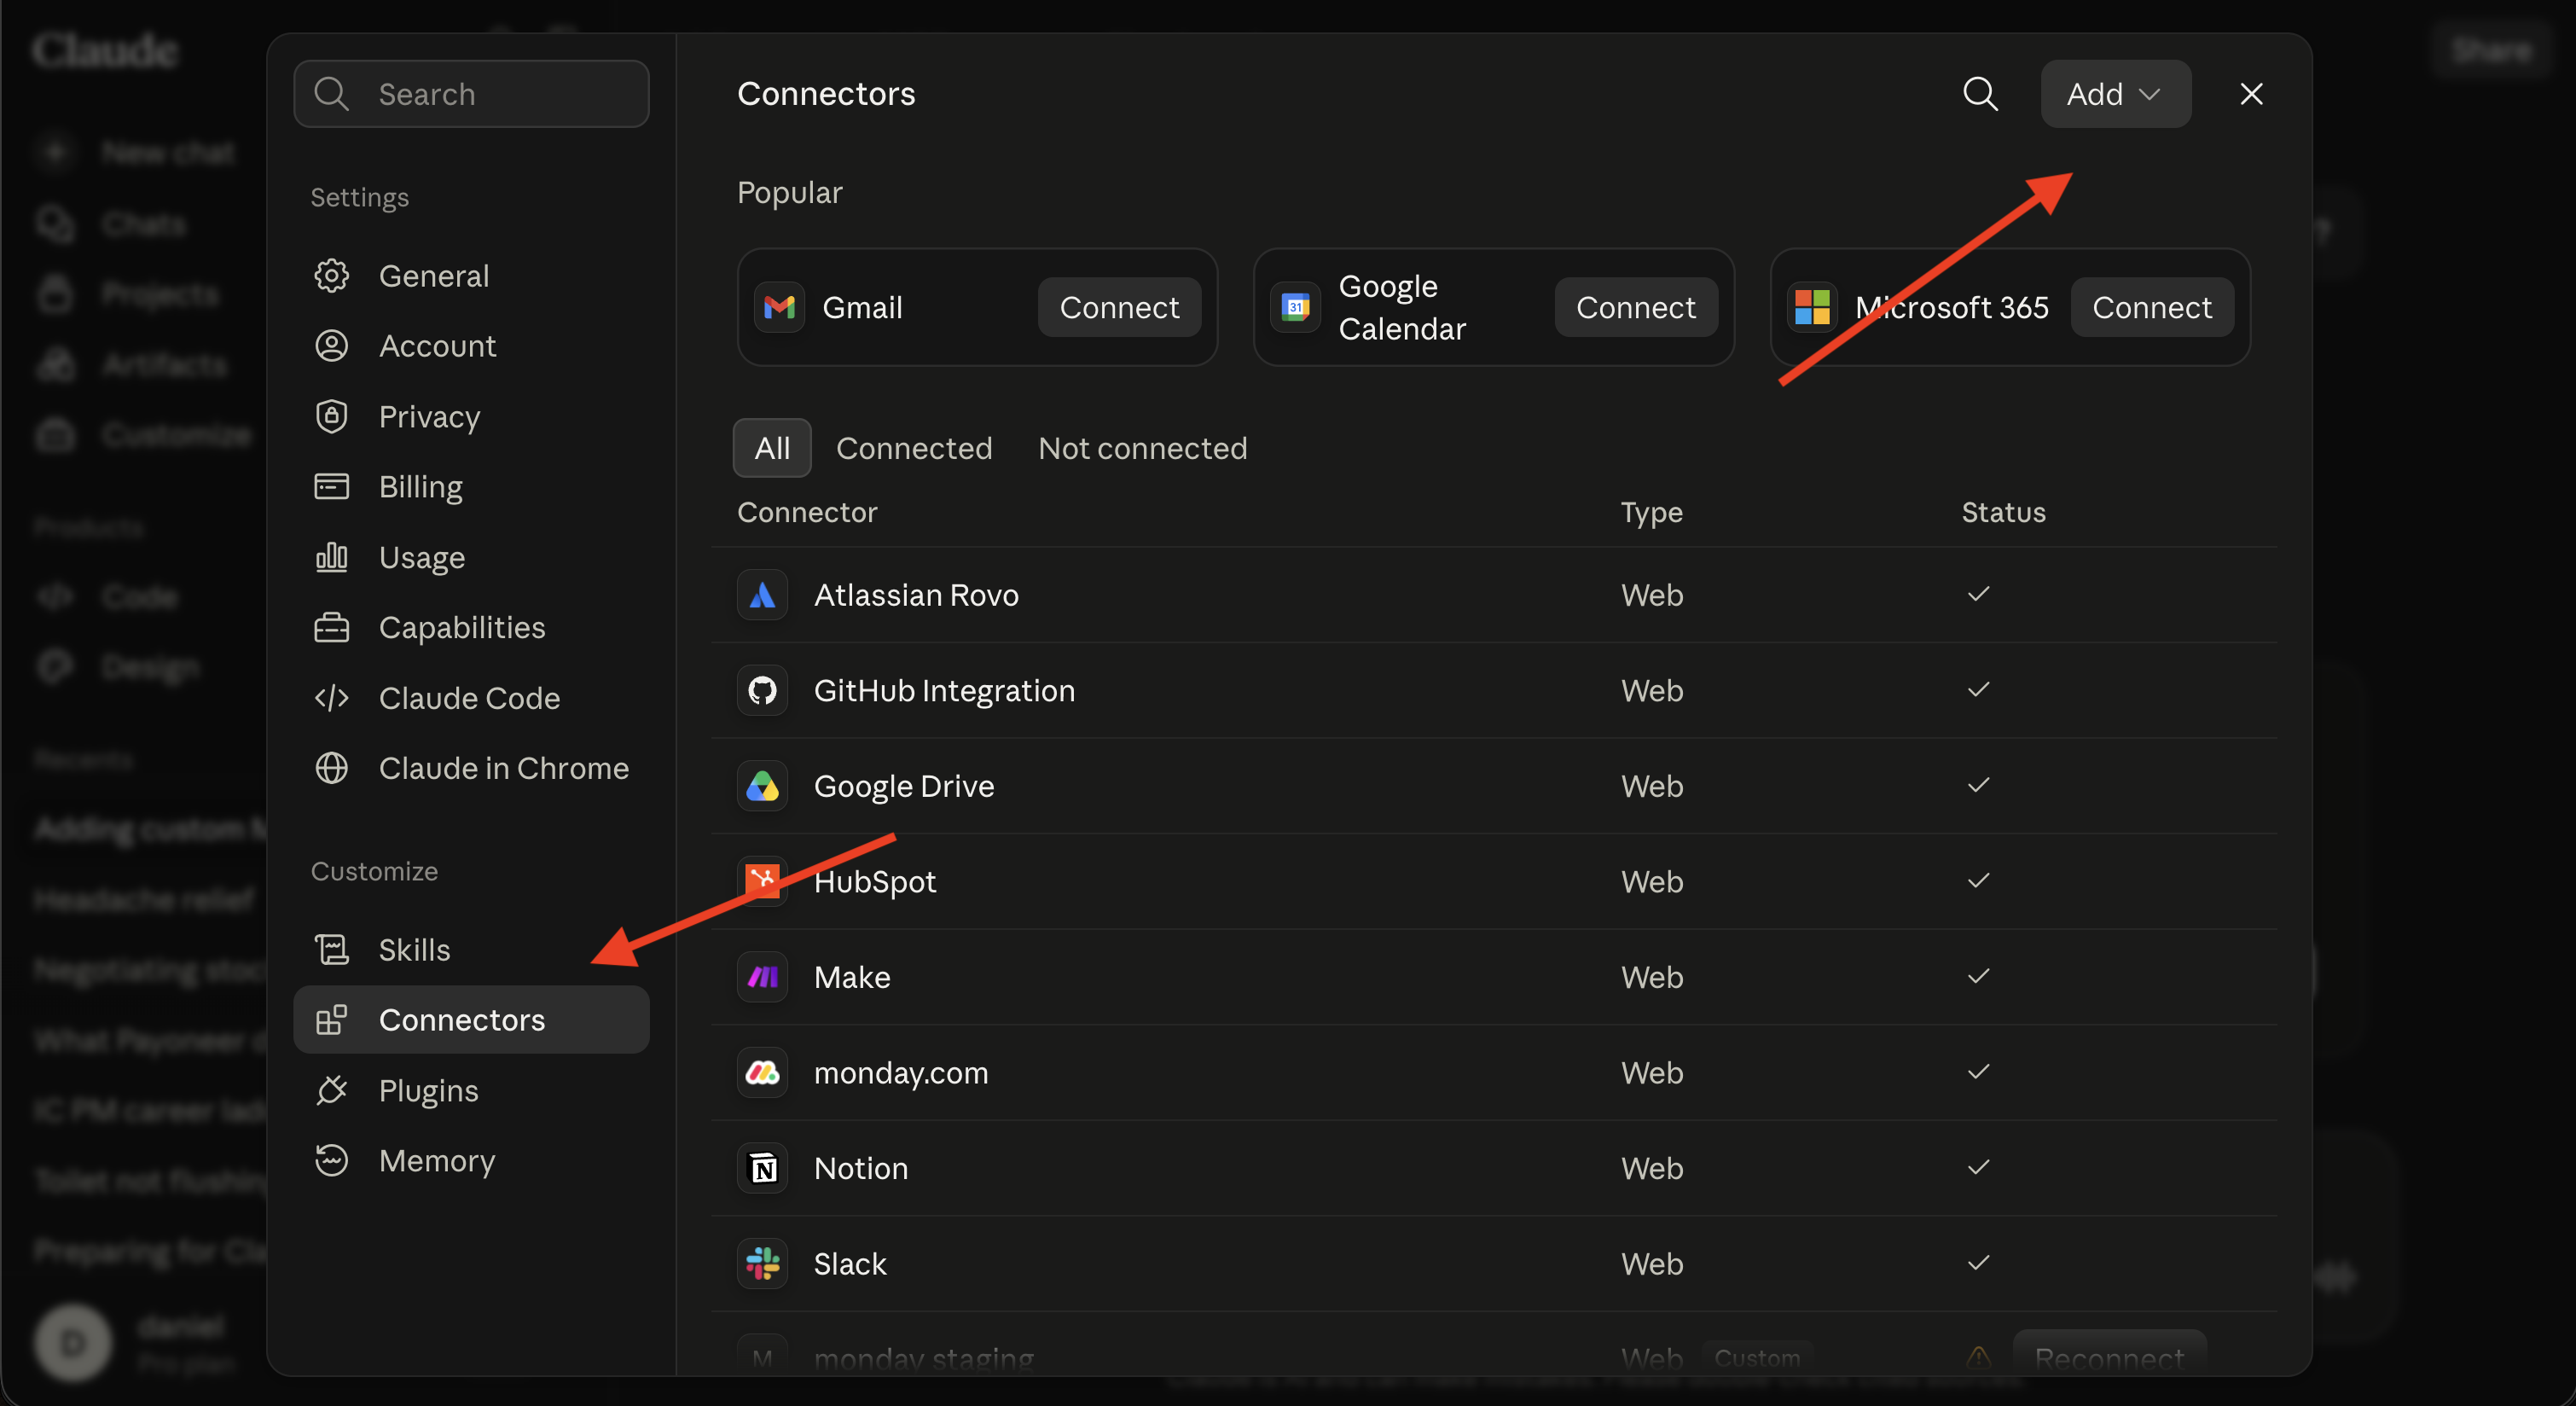
- Choose the option to add a custom connector
- Enter:
- Name:
monday.com - MCP server URL:
https://mcp.monday.com/mcp - Under Advanced settings: your OAuth Client ID and OAuth Client Secret from Step 1
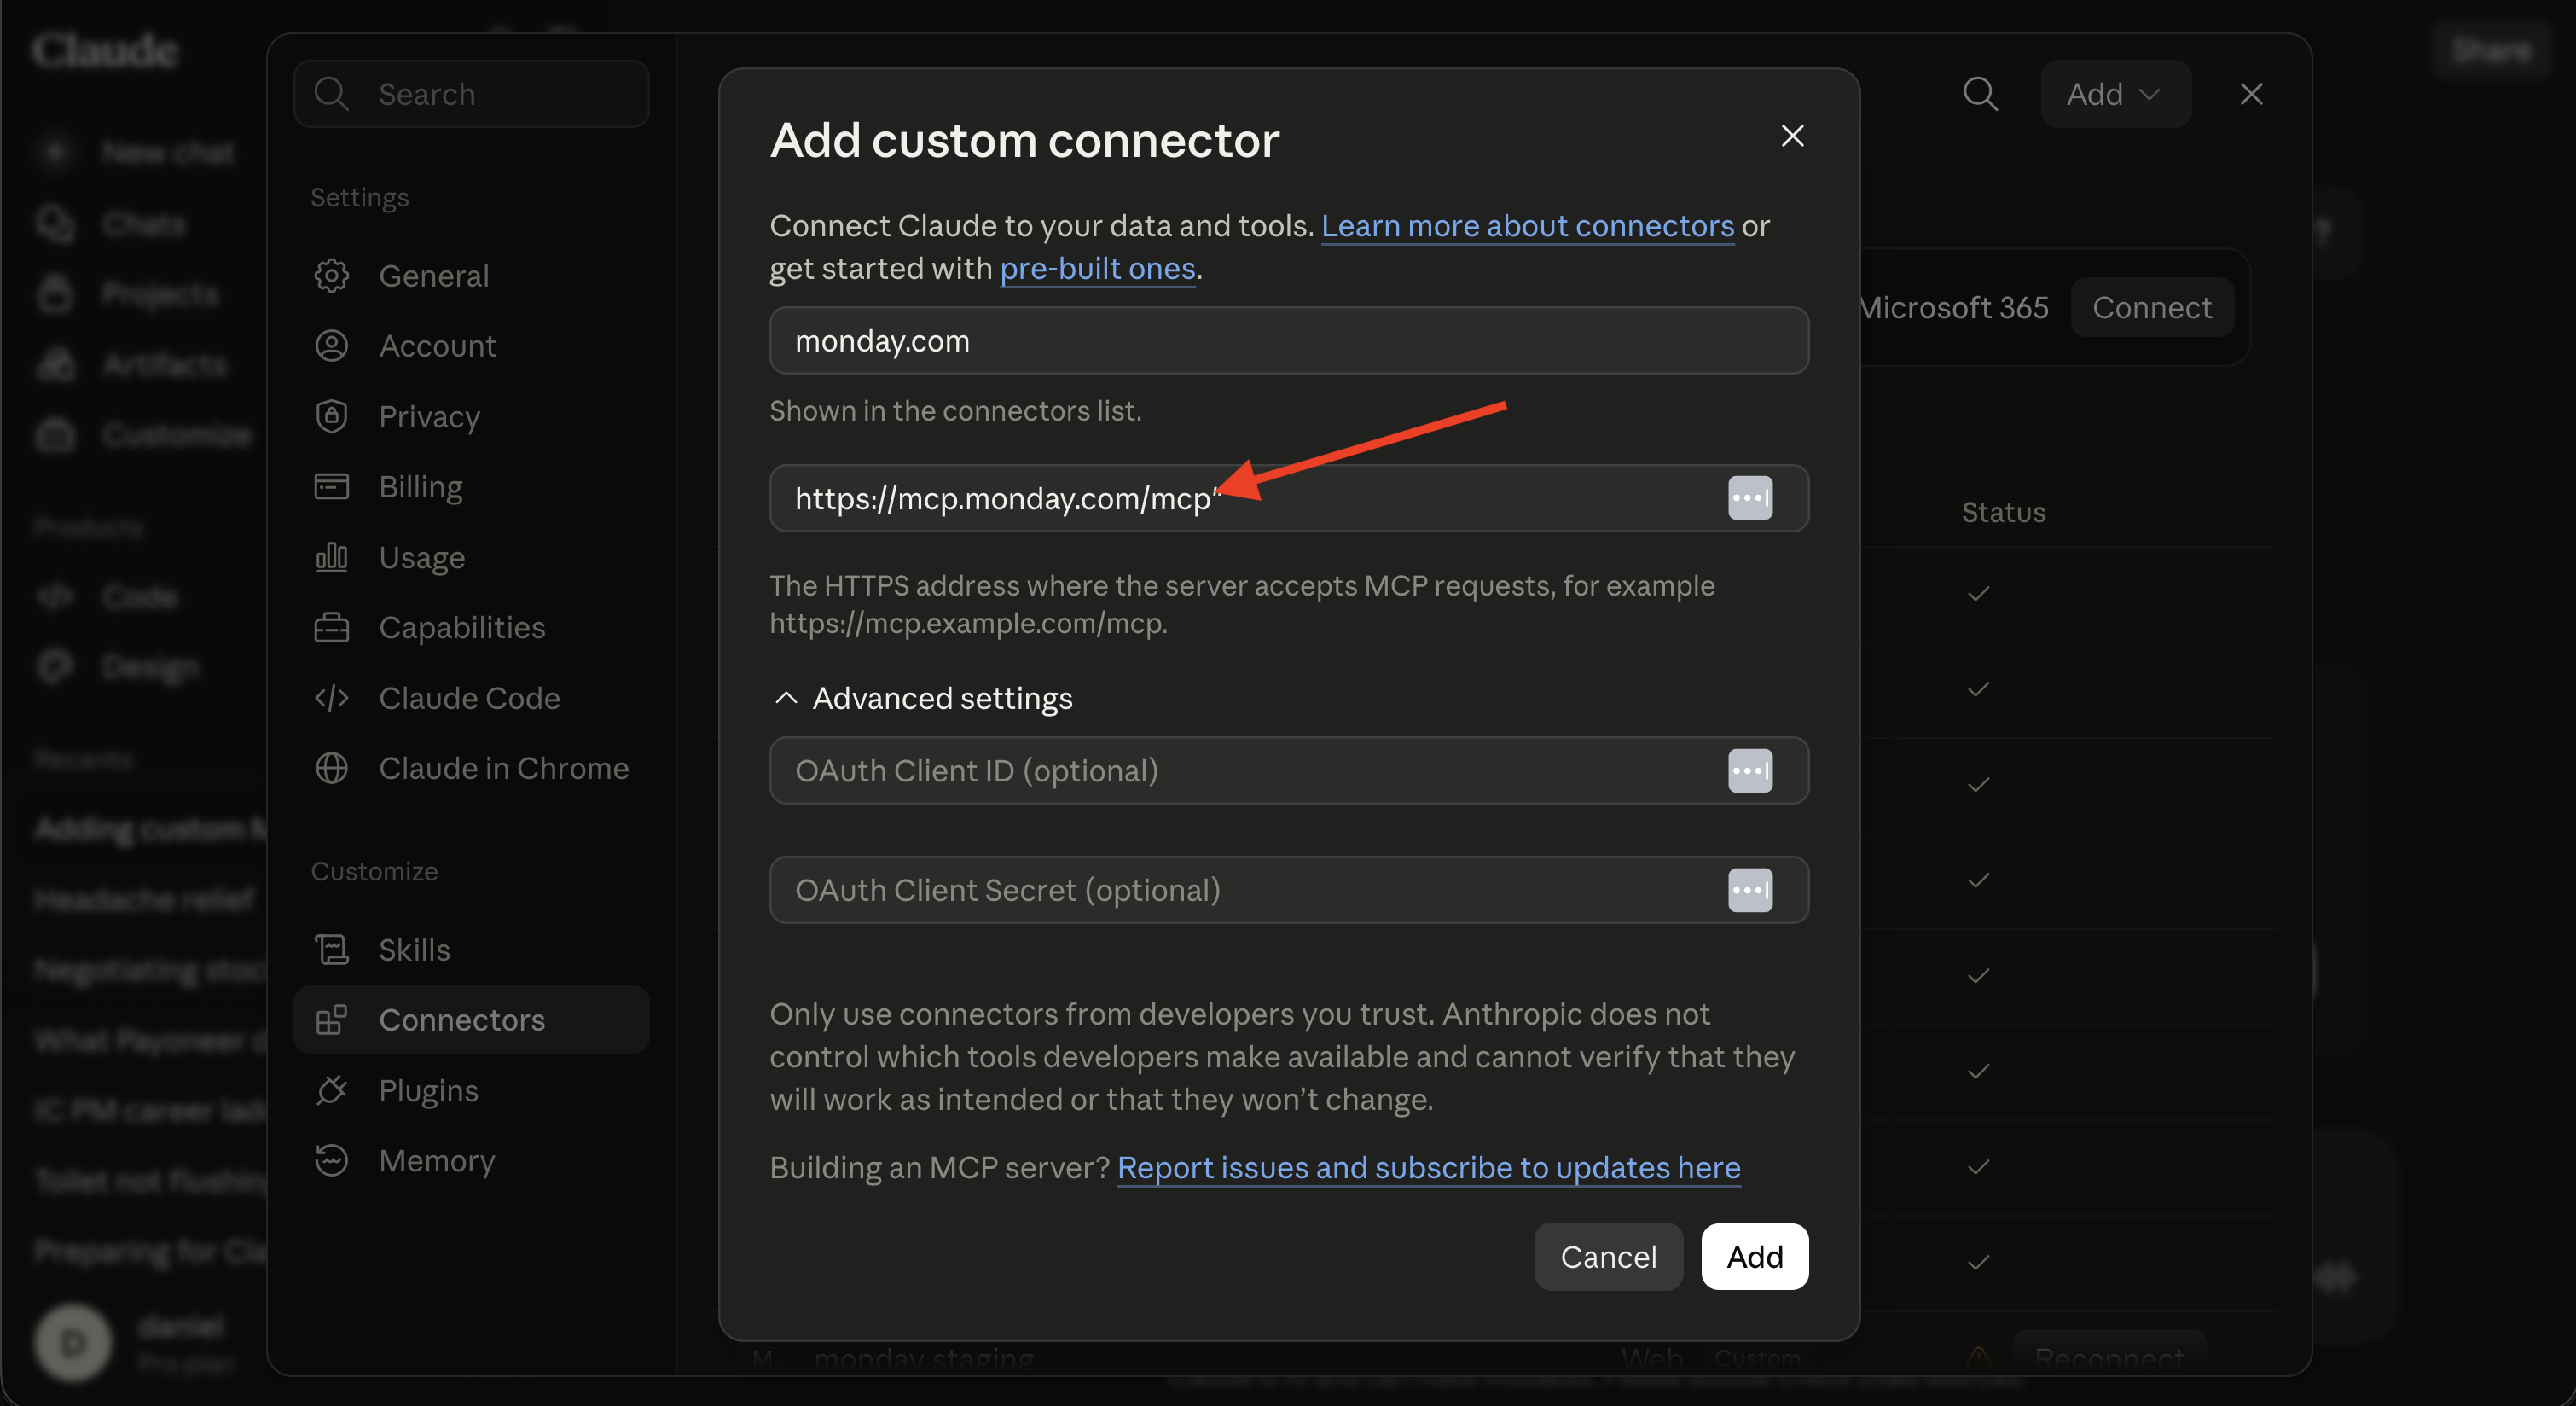
- Click Add. The first connection attempt will trigger monday.com's OAuth authorization screen, using your app.
Only share the URL, Client ID, and Client Secret with users you want to authorize.
Step 4: Verify
Have one user complete the OAuth flow and confirm the connection appears under your app (not the hosted connector) in the monday.com developer platform.
What happens after you connect
All MCP tool calls in Claude run as the authenticated monday.com user, limited by both that user's platform permissions and the scopes on your OAuth app. The MCP token can't exceed either boundary — it doesn't grant permissions the user lacks, and it can't use permissions the app didn't request.
Related resources:
Updated 9 days ago