OAuth and Permissions
Authenticating monday apps with OAuth2 and defining permission scopes.
OAuth 2.0 is a protocol that lets your app request authorization to read or modify data in a user's monday account. At the end of the OAuth process, your app gets an access token that belongs to the user and grants access to specified permission scopes.
You can set up OAuth for your app in just two steps: configuring your app and going through the standard OAuth flow.
A new OAuth 2.1 flow is available
monday.com now supports an improved OAuth 2.1 flow with expiring access tokens, refresh tokens, and token revocation. This page describes the current (legacy) flow. If you are building a new integration or want to upgrade your existing app, see Migrating to the new OAuth 2.1 flow.
Configure your scopes and redirect URLs
To start, you must first configure your app's scopes and redirect URLs. If you don't have an app, follow these steps to create an app in the monday UI and locate your client_id and client_secret.
Once your app has been created, set the scopes and redirect URLs in the OAuth tab in the Developer Center.
Permission scopes
OAuth scopes define what your app can and cannot do. Each endpoint in the monday API requires a certain permission scope, which can be found in our API reference.
When you ask a monday user to grant access to your app, you have to specify which of the following supported scopes you're requesting access to:
| Scope | Description |
|---|---|
| account:read | Read general information about the account |
| assets:read | Read data from assets the user has access to |
| boards:read | Read a user's board data |
| boards:write | Modify a user's board data |
| departments:read | Read the account's department data |
| departments:write | Modify the account's departments |
| docs:read | Read a user's docs |
| docs:write | Modify a user's docs |
| me:read | Read a user's profile information |
| notifications:write | Send notifications on behalf of the user |
| tags:read | Read the account's tags |
| teams:read | Read information about the account's teams |
| teams:write | Modify the account's teams |
| updates:read | Read updates and replies the user can see |
| updates:write | Post or edit updates on behalf of the user |
| users:read | Read profile information of the account's users |
| users:write | Modify profile information of the account's users |
| webhooks:read | Read existing webhooks configuration |
| webhooks:write | Create and modify webhooks |
| workspaces:read | Read a user's workspaces data |
| workspaces:write | Modify a user's workspaces data |
Redirect URLs
After a monday user approves or denies your app’s authorization request, they will be redirected back to your app's specified redirect_uri. You can use multiple URLs if you want to route users to different pages based on their context.
The OAuth flow
Once you've created and configured your monday app, you're ready to go through the standard OAuth flow. A successful OAuth authorization between your app, the user, and the monday OAuth server occurs in the following order:
- Make an authorization request and redirect the user to the monday OAuth URL with the client ID:
https://auth.monday.com/oauth2/authorize - The user sees the permission scopes your app is requesting and approves the request.
- The user is redirected to a defined URL (redirect URL) with a temporary authorization code in the query params after approval.
- Your app's backend sends a POST to the token request endpoint with this code. The token endpoint will respond with an access token. The access token gives your app access to the monday API on behalf of the user and will be valid until the user uninstalls your app.
Authorization request
The first step in the OAuth flow is making an authorization request and redirecting a user to the monday OAuth page. The OAuth request URL is: https://auth.monday.com/oauth2/authorize.
Example: GET https:/auth.monday.com/oauth2/authorize?client_id=1111
| Parameter | Description | Default value | Required |
|---|---|---|---|
| client_id | Your app's identifier. Located in the Basic Information tab. | Yes | |
| redirect_uri | URL to redirect back on approval/denial. Must match one of the redirect URLs added to your app. | If you've only configured one redirect_uri, it will be used. | Yes, if more than one redirect_uri is configured |
| scope | A space-separated list of OAuth scopes indicating the permissions your app is requesting. All requested scopes must match the list you configured in your app. | The full scope list configured in your app | No |
| state | An arbitrary value that will be passed to your app on approval or denial. Use a unique state parameter to avoid forgery attacks and check the value at every step of the OAuth flow. | No | |
| app_version_id | The app version's unique identifier. Enables app collaborators to go through the OAuth flow for the requested app version (live or draft). You can get it from your app's URL, after app_versions. This will not work for deprecated versions and non-app collaborators. | The live version's callback URL defined in the Developer Center. If there is no live version, the latest version created on the app will be used. | No |
| force_install_if_needed | Enables a seamless OAuth flow by automatically redirecting users to the app installation page if the app is not installed. Once an admin installs the app, they are redirected back to the OAuth page to complete the authentication process. | No |
Redirect
After the user grants permission to your app in step 2, they will be redirected to your app using the provided redirect_uri as part of step 3. We will add the authorization code, scope, and state to query parameters:
| Parameter | Description |
|---|---|
| code | The generated authorization code. Valid for 10 minutes. |
| state | The state parameter supplied in the previous step. |
Token request and response
Once you have obtained an authorization code from the authorization endpoint, you can exchange it for an access token to make calls to monday’s API. The authorization code is only valid for 10 minutes, after which you will have to make another request to get another code.
Request structure
The HTTP verb in your request should be POST, and the token URL is https://auth.monday.com/oauth2/token.
| Parameter | Description |
|---|---|
| client_id | Your app's unique identifier. Located in the Basic Information tab. |
| client_secret | Your app's secret. Located in the Basic Information tab. |
| redirect_uri | This parameter is used for validation only - there is no redirection. The value must match the value supplied in the Authorization Request step. |
| code | The authorization code from the previous step. |
Response structure
On success, the response contains the status 200 OK in the header and the following JSON data in the body:
| Key | Description |
|---|---|
| access_token | The access token used to make API calls. Tokens do not expire and are valid until the user uninstalls your app. Our OAuth flow does not support refresh tokens. |
| token_type | All monday OAuth tokens are bearer tokens. |
| scope | A comma-separated list of scopes that have been granted for this access token. |
The JSON body of the response will look like the following:
{
   "access_token": "NgeFeX...FEmEka",
   "token_type": "Bearer",
   "scope": "boards:write boards:read"
}
OAuth flow for users with multiple accounts
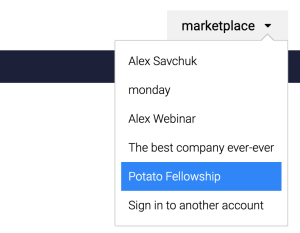
Some monday.com users will be part of multiple accounts, so your app may want to specify which account to authorize the user for. In the standard OAuth flow, the user can select the monday.com account where they'd like to authorize using a dropdown menu.
If you want to ensure the user authorizes a specific account, you can change the Authorization URL based on their account URL.
There are two methods to do this using the account slug: constructing the URL or adding a query parameter.
Constructing the URL
This method involves constructing the URL with the slug/subdomain of the account, or the first part of the URL that comes before .monday.com. Users can still change the account using the dropdown, but the slug you specify will be the default. You can easily access an account's slug by querying the account through monday API.
Let's say we queried the account and the slug is awesomeapp. The OAuth flow URL would look like this:
https://awesomeapp.monday.com/oauth2/authorize?client_id=<CLIENT_ID>&redirect_uri=<YOUR_URL>
Adding a query parameter
Instead of constructing the URL, you can add the subdomain=<ACCOUNT_SLUG> query parameter to the URL to create the link using their account slug. Unlike the previous option, users can't change the account using the dropdown since they are forced to use this specific slug.
Using the example above, the URL would look like this:
https://auth.monday.com/oauth2/authorize?client_id=<CLIENT_ID>&redirect_uri=<YOUR_URL>&subdomain=awesomeapp
Error codes
On an error of any kind, the user will be redirected back to the specified redirect_uri. The possible errors you can get are:
| Error code | Description |
|---|---|
| 400 | invalid_request |
| 403 | unauthorized_client |
| 403 | access_denied |
| 403 | invalid_scope |
| 500 | server_error |
| 500 | temporary_unavailable |
Join our developer community!We've created a community specifically for our devs where you can search through previous topics to find solutions, ask new questions, hear about new features and updates, and learn tips and tricks from other devs. Come join in on the fun! 😎
Updated 19 days ago