Views
Step-by-step instructions to build a simple client-side monday app with React!
This tutorial guides you through building a simple "Hello World" app with React, starting small and gradually expanding functionality. The same code can be used as a board view, item view, or dashboard widget.
Supported frameworks
This tutorial serves solely as an example and was written using React. The monday apps framework is framework-agnostic, so you can build with any JavaScript framework for the client and any programming language for your server. Keep in mind that views and widgets run in a client's browser, so they'll need to compile into HTML/CSS/JavaScript.
Before we begin
What you will learn
- How to build a simple "Hello World" app in React
- How to package and upload a production-ready monday app
Prerequisites
- Basic understanding of web programming (HTML, CSS, JS)
- Working environment of NodeJS on your computer, as well as a package manager like npm or yarn.
- A monday.com account. If you don't have one, sign up for a free developer account here.
- Access to a monday.com API token
Step 1. Create your monday app
- Create an app.
- Add an app feature. Select between Board View, Account Settings View, or Dashboard Widget.
- Choose a template or build your own from scratch. For this tutorial, we will select Quickstart - ReactJS.
- You will then see this screen below. Keep the tab open, and move on to the next section.
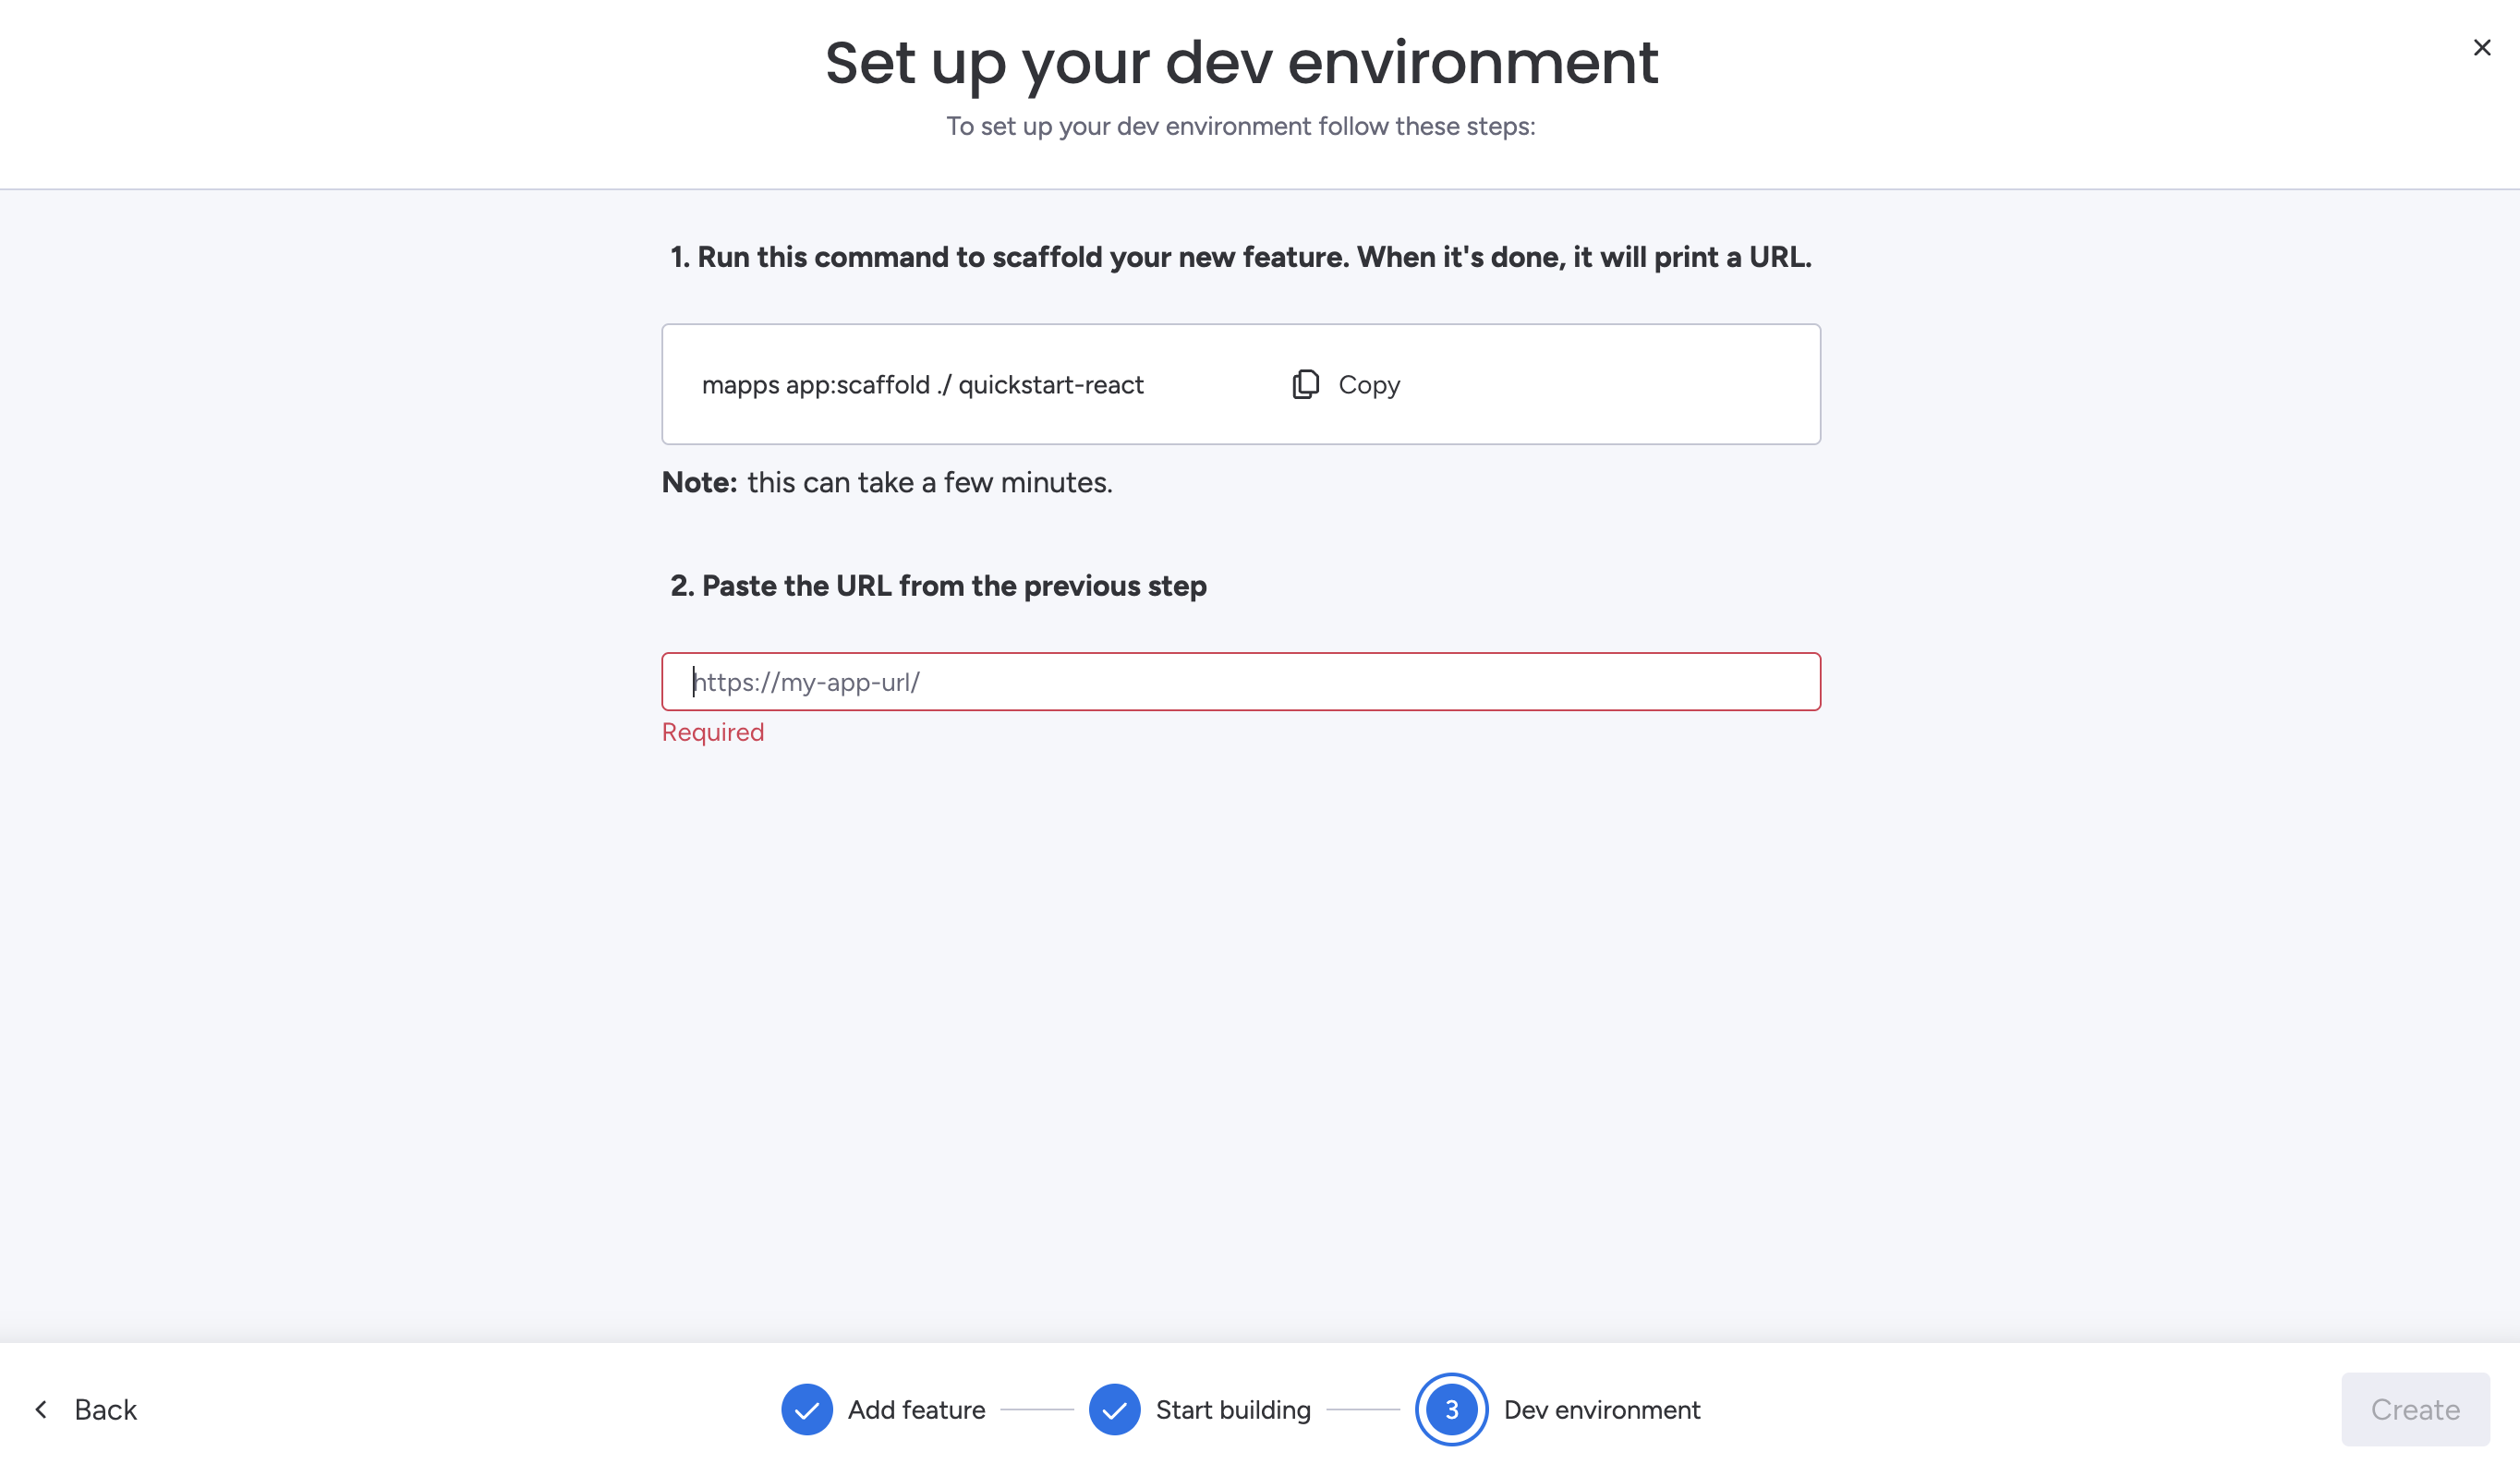
Step 2: Set up your development environment
After selecting Quickstart - ReactJS, you will need to set up your development environment.
Important: We use the apps-cli (mapps), not the legacy monday-cli, which is no longer supported for new apps.
- Install the apps-cli (mapps) globally:
npm i -g @mondaycom/apps-cli- Initialize it using your monday.com API token:
mapps init -t YOUR_TOKEN- Download and run the Quickstart app. The CLI will also create a temporary secure tunnel, so your local app can be accessed by monday.com.
mapps app:scaffold ./ quickstart-reactThis command will:
- Download the quickstart-react project into your current directory
- Install dependencies (npm install)
- Run the app locally immediately after installation (npm run start)
- Wait for the installation process to finish. This may take a few minutes.
Step 3: Connect your app to monday.com
- Once the app is running, you’ll see a message similar to:
Your app is served from this URL:
https://abc1234asdlqwe.loca.lit
- Return to the screen at the end of step 1 and paste the URL.
- If you want to run the application manually in the future:
cd quickstart-react
npm run start
Step 4: Update your view's basic information
After setting up your development environment, the system automatically redirects you to the Feature Editor.
-
Open the Feature Details tab.
Note: This is where you can add a title and description to your board view or widget. Users will see the title and description in the View or the Dashboard Center.
-
You can update the feature's name, description, Learn More link, or Feedback link. You can also choose whether to hide the board controls.
-
Save your changes and navigate to the View Setup tab.
-
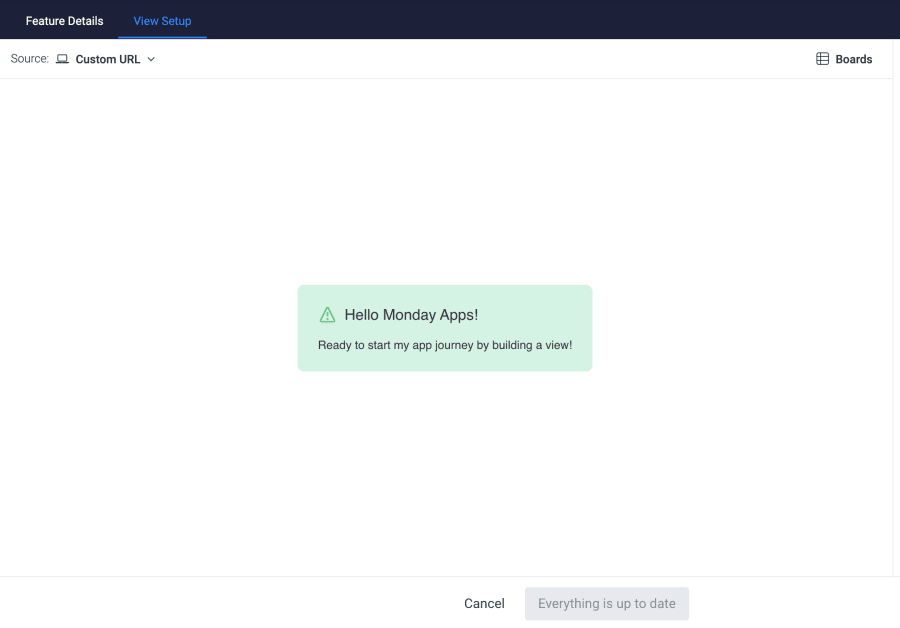
The tab will display the initial example app and show Hello Monday Apps.
-
You should now be able to load the app for the first time using your tunnel URL.
We've recently added an Attention Box element from our design elements to the app's initial load. It looks like this when you first open the app:
You can find more info on our design system here. You can also reference the Attention Box element.
Step 5: Edit src/App.js to include a simple UI
src/App.js to include a simple UI- Navigate to the quickstart-react folder.
- Open the
App.jsfile downloaded in the starter code package. - In the function
App, you will see areturn()function. - If you want to replace the text displayed in the Attention Box on initial load, you can use the
textproperty within the Attention Box element. This is assigned to theattentionBoxTextvariable. Replace the text with whatever content you want, and it will display in the attention box.
Note: Your return() method should look something like this after these steps:
const attentionBoxText = `Ready to start my app journey by building a view!`
return (
<div className="App">
<AttentionBox
title="Hello Monday Apps!"
text={attentionBoxText}
type="success"
/>
</div>
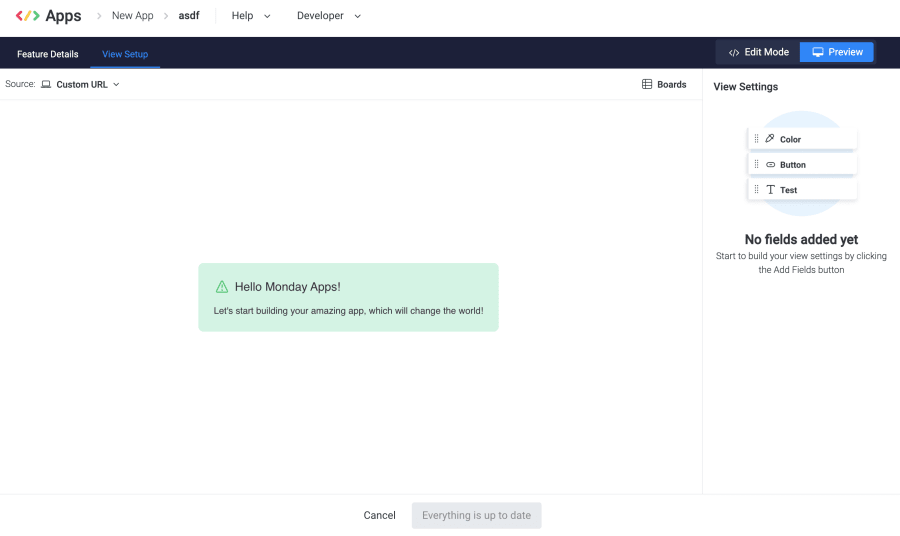
);Navigate to Preview after opening the View Setup section. You will see this:
Now we can edit a style element from our Design System!
Step 6: Upload your monday app build
To build our simple application, we will bundle it in a ZIP file and upload it to the monday.com server.
- Compile your React code into a production build by running
npm run build. This command will create a new build folder in your directory. - Create an archive of the contents of your build folder (ZIP file).
- Open your feature and select the Builds tab. Click New Build to upload your production code.
- Upload the ZIP you just created.
- Open a board and add your view to it. Your app should display data for the first item on the board.
Security in our CDNWhen you upload a client-side app to our platform, it is hosted on the monday.com apps CDN. Note that this CDN does not have authentication on it. Any views or widgets uploaded to our platform will be publicly-accessible via a randomly-generated (and difficult to guess) URL.
If this is not suitable for you, you can serve your app via an iframe URL instead.
Updated 6 months ago