Custom fields
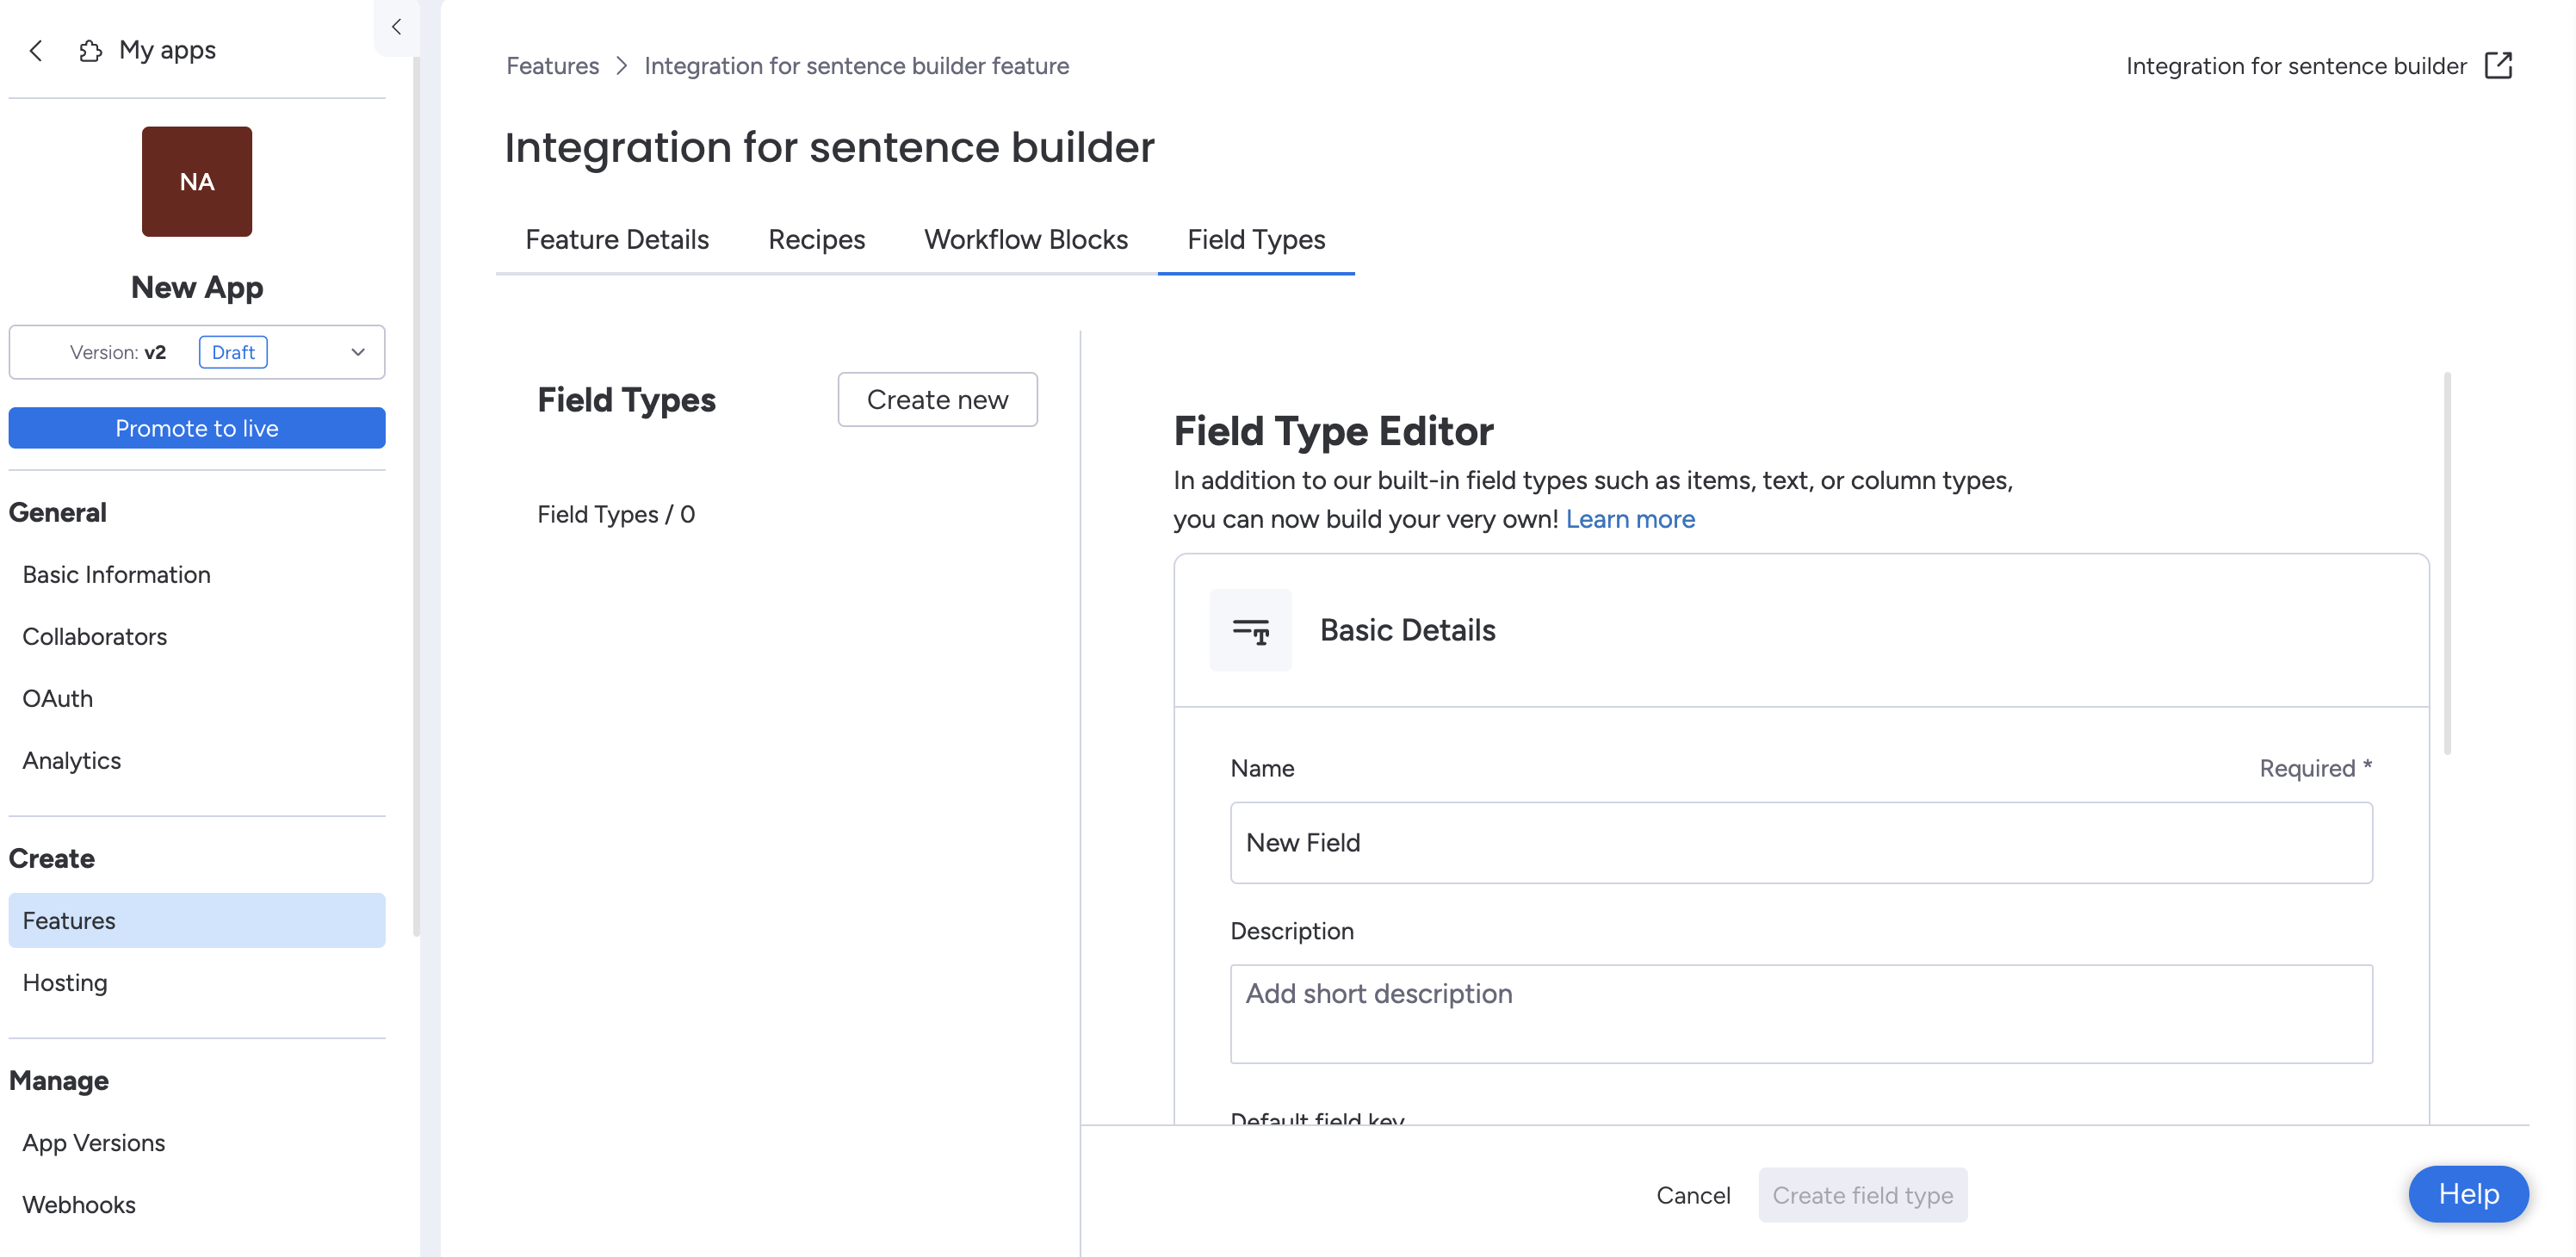
In addition to our built-in field types such as items, text, or column types, you can now build your very own!
Custom fields are reusable objects that enable you to create and reuse configuration fields in your integration recipes (i.e., you can use them in both your trigger and action blocks!) They are especially useful when you want to load configuration data from an external platform into your monday.com integration recipe.
For example: You can load options for your app users to choose from when configuring the recipe (i.e., a list of Zendesk tickets or Slack channels).
It’s important to consider reusability when building custom fields to help you create multiple integration recipes in your app with the same custom fields you define.
Create a new custom field
- Open your Integration for sentence builder app feature.
- Click the Field Types tab.
- Press Create new.
- Complete the following sections:
- Name: Describe what your custom field is (i.e., Zendesk Ticket Fields or monday.com Boards List)
- Description: Explains what your custom field contains
- Default field key: Acts as the name of this custom field type when you use it in your integration recipes
- Automation configuration: Can be one of the following four types: text, list, dynamic mapping, or credentials
Text
The Text type allows you to create a field type with a predefined field key for repeated use.
For example: If you have a project with the field key “projectId,” you can utilize this key for all other trigger and action blocks instead of re-configuring it each time
Text columns allow you to select whether your text custom field type has numbers only. This will force users to only add numeric characters, which can be useful if the custom field will only include numerals, like ID numbers.
List
The List type allows you to generate an array of options for selection.
For example: Creating a list of all the Zendesk tickets in an account
If you only want to manually define a few field options, you can add different key-value pairs Options in your list field type.
Alternatively, if you only want to load the list options remotely, you can insert an endpoint URL that contains all the array of values in your list in the Remote Options URL box. The data returned by your remote options URL should be an array of key-value pairs, and each option should have a title
and value
.
Pagination
You can also include the isPaginated
field if your results are paginated. You can pass additional options like nextPageRequestData
(shouldn't be used for the last page) and isLastPage
(should be true
when it is the last page.
app.post("/fetchRemoteOptions", function(req, res) {
const { payload } = req.body;
const { pageRequestData } = payload;
const { page = 1 } = pageRequestData;
res.status(200).send({
options: [
{title: "Label 1", value: "label_1"},
{title: "Label 2", value: "label_2"}],
isPaginated: true,
nextPageRequestData: { page: page + 1 }, // only include if using pagination
isLastPage: false, // or true if there are no more pages
]);
})
Dependencies
You can also add Dependencies to the list field type to determine what other object the list field type is dependent on.
For example: If I want to load all of the items on a specific monday.com board, the list field type of the item custom field will include a dependency of the board custom field
If you choose to utilize a dependency, the payload to your remote options URL will look like this:
{
"payload": {
"boardId": 12345678,
"automationId": 123456,
"dependencyData": {
"boardId": 12345678
},
"recipeId": 123456, //unique ID of the recipe in your app. the same recipe ID will be sent if two different accounts are using the same recipe
"integrationId": 123456 //unique ID of the integration recipe on your board
}
}
In the example mentioned above, the dependent custom field URL payload will contain the ID of the custom field it's dependent on (i.e., the POST request for the remote options URL that loads a list of items will contain the board ID on which the items are located).
Pagination for remote options
If your app returns many remote options, you can use pagination to return them in smaller batches. You can also use pagination to go through the items until the response is empty and all the items have been retrieved if the API you are fetching your options from limits the records that can be retrieved with a single request.
You will receive from Monday a payload when someone clicks on the field for getting your options that will be similar to this:
{
recipeId: 30019598123,
integrationId: 72966189123,
automationId: 72966189123,
pageRequestData: {},
dependencyData: null
}
The payload contains a pageRequestData
parameter that identifies the page used for your request.
The response must contain:
- Your
options
as an array of key-value pairs where each option should have atitle
andvalue
- The
isPaginated
parameter (boolean) - The
nextPageRequestData
containing metadata for the following page. If the user requests more options, the value ofnextPageRequestData
will be sent in the next request aspageRequestData
.
Here are two implementations:
app.post("/fetchRemoteOptions", async function(req, res) {
// de-structure request payload
const pageLimit = 10;
const { payload } = req.body;
const { pageRequestData } = payload;
const { page = 1 } = pageRequestData;
// call external API
const response = await fetch(`https://yourApi.com/users?page=${page}&limit=${pageLimit}`);
const myUsers = await response.json();
// generate array of options
const options = myUsers.map((user) => {
const value = {
title: user.name,
value: user.id
}
return { value, title: user.name };
});
const nextPageRequestData = options.length === 0 ? null : { page: page + 1};
// return HTTP response
res.status(200).send({
options,
isPaginated: true,
nextPageRequestData
});
})
const getRepositories = async (token, payload) => {
const octokit = new Octokit({ auth: token });
const { pageRequestData } = payload;
const { page = 1 } = pageRequestData;
const reposResponse = await octokit.repos.list({per_page: YOUR_MAGIC_NUMBER, page });
const repos = reposResponse ? reposResponse.data : [];
const options = repos.map((repo) => {
const value = {
uniqueId: repo.id,
owner: repo.owner.login,
name: repo.name,
full_name: repo.full_name,
ownerType: repo.owner.type,
};
return { value, title: repo.name };
});
const nextPageRequestData = !repos.length ? null : { page: page + 1 };
return { options, nextPageRequestData, isPaginated: true };
};
app.post("/fetchRemoteOptions", async function(req, res) {
const { userId } = req.session;
const { payload } = req.body;
const token = await TokenService.getToken(userId);
const response = await getRepositories(token, payload);
res.status(200).send(response);
})
In the example, we start on page 1 and get batches of 10 items each. The requests will continue until there are no more items to retrieve.
The users' names are the visible options to choose from. pageRequestData
starts with a value of 1 and will add one to the page number for every new request. When the response for the options is empty, nextPageRequestData
is set to null
and there will be no more requests.
When fetching your options using an external API, the required parameters may vary depending on how that API works.
Dynamic mapping
The Dynamic mapping type allows you to define a custom object containing a set of subfields. This is especially useful if you want to load data from third-party software.
For example: Mapping Zendesk ticket information into columns on a monday.com board
The Field Definitions URL loads a payload of data containing all fields for your custom field, which is helpful for mapping data between monday.com and other software.
Check out our dynamic mapping article to learn more about this field type.
Credentials
The Credentials type allows you to store and manage a set of profiles in an integration recipe. You can read more about the credentials field here.
Input and Output fields (I/O)
Each integration recipe has a Trigger and an Action block. The trigger block determines what initiates your integration recipe (i.e., When a status changes). The action block determines the action that you’re hoping to accomplish (i.e., Create a new item).
Input and output fields transfer data between blocks and allow users to pass configurations to these blocks.
For example: A user’s recipe configuration can be one of the input fields in your blocks, and the output fields of a trigger can be mapped to the input fields of the action.
Trigger I/O fields
When building custom triggers, you can configure the input and output fields yourself.
The trigger's input fields can come from either the context of your integration recipe or from your recipe sentence (i.e., what the user chooses when using your integration recipe). The output fields of your trigger are what will be mapped into your action’s input fields.
If you’re using a built-in trigger, you can learn more about that trigger’s output fields by hovering your mouse over the information icon. For custom triggers, you can configure the output fields yourself. The output fields should contain the data you will need to utilize in your action block.
For example: Say you’re looking to create a monday.com item every time you receive a ticket in Zendesk. The output fields of your trigger need to include the board Id of your monday.com board where this recipe lives so your new item can be created on the correct board.
Action I/O fields
Your action block only allows you to customize input fields since the output of this block is the action itself. The trigger's input fields need to include all of the data needed to complete your action.
If you plan to use dynamic mapping into a monday.com item, the input field of your mapped item needs to be the output field of your trigger block, not the custom entity you’ve created. This is because the monday apps framework will do all of the mapping for you!
Check out our article on custom actions to learn more!
Remote Options Dependencies
In the example above, the “parent” custom field is the custom list of boards within a monday.com account. The dependent “child” custom field is the list of items on the selected board.
When setting up the custom action in your integration recipe that will utilize these remote options dependencies, the input field settings for the “child” (or the dependent custom field) will include a dependency on the “parent” custom field.
Your configuration should look like this:
Join our developer community!
We've created a community specifically for our devs where you can search through previous topics to find solutions, ask new questions, hear about new features and updates, and learn tips and tricks from other devs. Come join in on the fun! 😎
Updated about 2 months ago