Triggers
Technical reference to build your own trigger blocks
This app feature will be deprecated soon. We recommend building on the monday workflows infrastructure. Learn more about the migration here.
Triggers are events that start an integration. This reference describes the API your app uses to start and manage integrations.
Background
Trigger blocks define when an integration runs. Many apps trigger based on third-party webhooks, but any event source can be used.
Your app must handle three key steps:
- Subscribe: monday.com calls your Subscribe URL when a user adds your trigger to a board.
- Trigger: Your app calls the subscription’s webhook URL to run the integration.
- Unsubscribe: monday.com calls your Unsubscribe URL when the trigger is deleted.
To learn how to configure the trigger block UI, see Build a trigger block.
.# Reference
Subscribe URL
When a user adds your trigger to an integration, monday.com sends a POST request to your app’s Subscribe URL. This request includes a webhook URL, which your app will call later to trigger the integration’s actions.
Request
Method: POST
Authorization: JWT in the headers
Body:
{
  "payload": {
    "webhookUrl": "https://api-gw.monday.com/automations/apps-events/481690204",
    "subscriptionId": 481690204,
    "blockMetadata": { "shouldCalculateDynamicMapping": false },
    "inputFields": { "text": "hello world" },
    "inboundFieldValues": { "text": "hello world" },
    "credentialsValues": {},
    "recipeId": 30440657,
    "integrationId": 398739197
  }
}
Response
You should return 200 OK to confirm the subscription. Be sure to store the subscription details (especially the webhookUrl) for future triggers.
If you prefer to use your own ID instead of monday’s subscriptionId, return it as webhookId:
{ "webhookId": 111 }Triggering your block
When an external event occurs (e.g., a new CRM lead), trigger your monday.com block by sending a POST request to the integration's webhookUrl.
1. Create a JWT
Sign your app’s ID with your signing secret:
const jwt = require("jsonwebtoken");

const appId = 11111;
const signingSecret = process.env.MONDAY_SIGNING_SECRET;

const token = jwt.sign({ appId }, signingSecret, { expiresIn: "1m" });
2. Send the request
curl -X POST "$WEBHOOK_URL" \
  -H "Content-Type: application/json" \
  -H "Authorization: Bearer $token" \
  -d '{
    "trigger": {
      "outputFields": {
        "text": "Hello?",
        "number": 9
      }
    }
  }'
Unsubscribe URL
When a user removes your trigger (recipe) from a board, monday.com sends a POST request to your app’s Unsubscribe URL.
1. Receive the request
Method: POST
Authorization: JWT in headers
Body:
{
  "payload": {
    "webhookId": 481690204 // your webhookId or the subscriptionId
  }
}
2. Remove the subscription
Use the webhookId to delete the stored subscription from your app's storage.
3. Respond to monday.com
Return 200 OK (no payload).
If your app responds with an error or non-2xx status, the automation will be deleted and no longer trigger. Future webhook calls will have no effect.
The Unsubscribe URL is only called when a recipe is deleted, not when it’s turned off. When turned off, the trigger remains but its actions are ignored.
Glossary
Events
Subscribe event: Occurs when a user adds your trigger to a workflow. monday.com calls your Subscribe URL.
Unsubscribe event: Occurs when a user deletes. monday.com calls your Unsubscribe URL.
Invocation: When your app calls monday.com's webhook URL to run the trigger block.
Input fields: Data your trigger receives to run. Typically defined by the user when they create the integration.
Output fields: Data your trigger emits when invoked. Typically data and metadata about the event.
Data flow diagram
The diagram below shows a custom trigger that relies on a webhook from an external CRM.
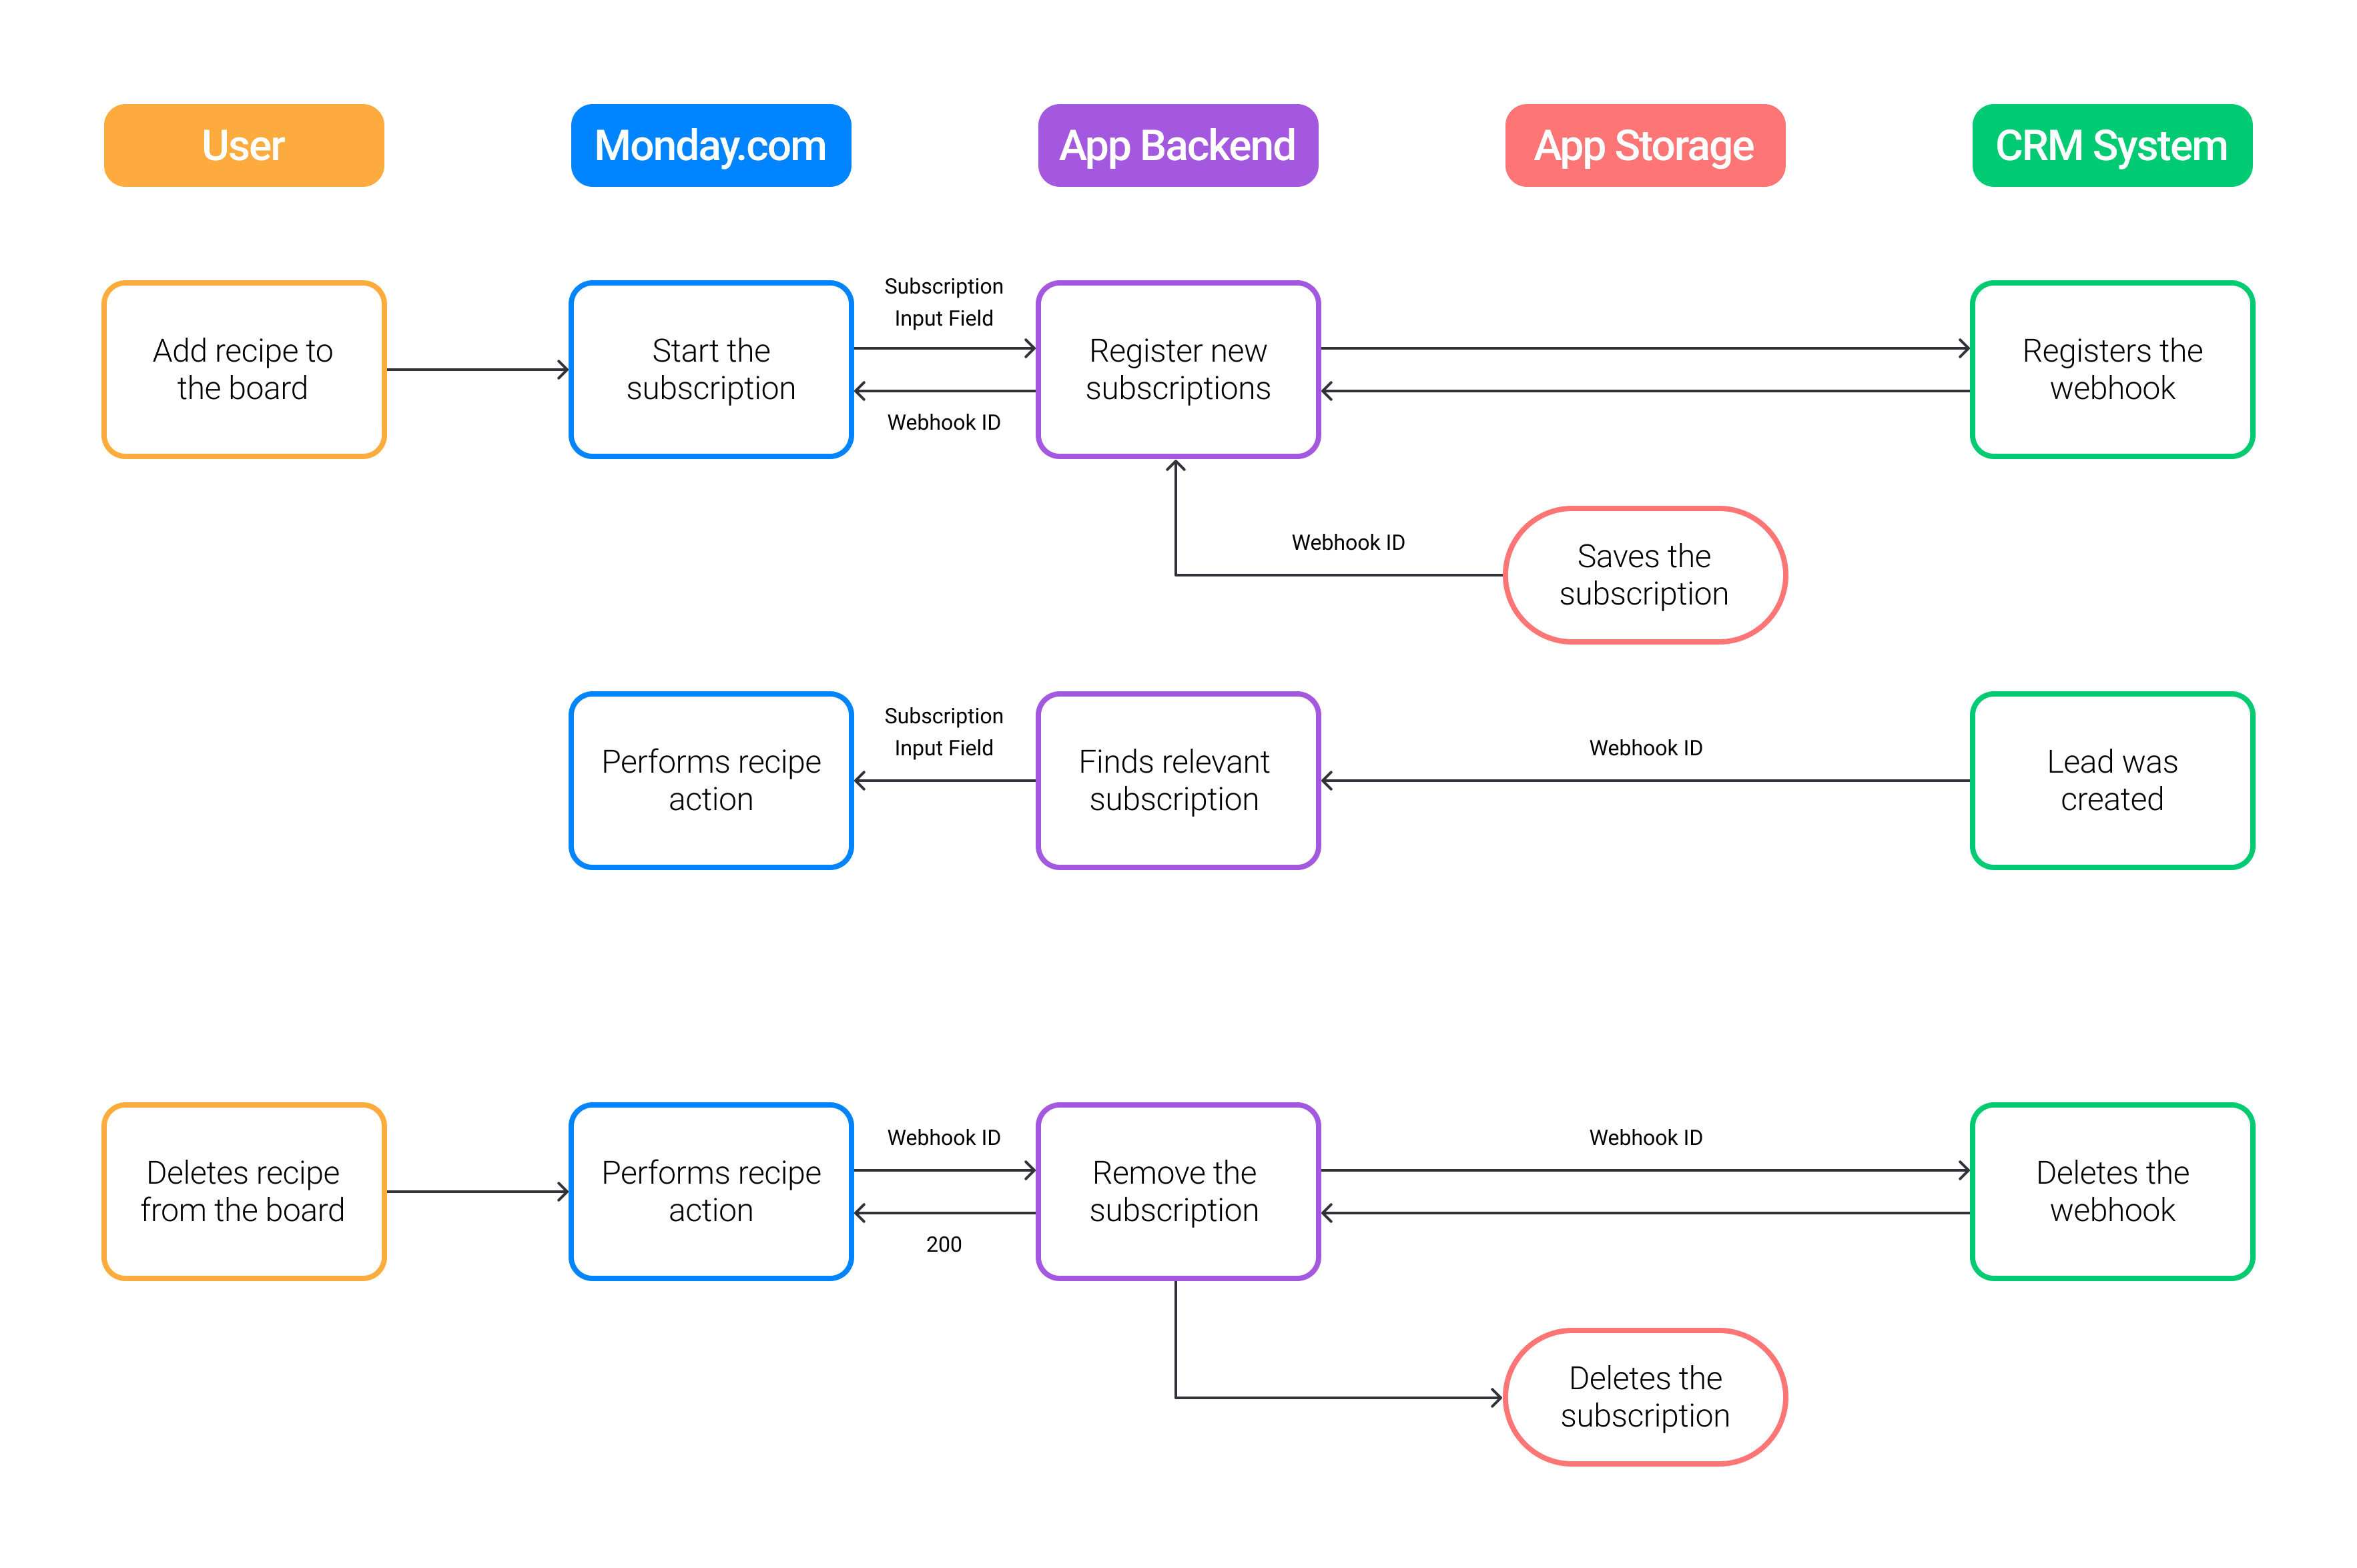
Trigger data flow between monday, your app, and a third-party CRM.
Updated 6 months ago